REVIEW · OAHU
Kailua Twin Islands Guided Kayak Tour, Oahu
Book on Viator →Operated by Kailua Beach Adventures · Bookable on Viator
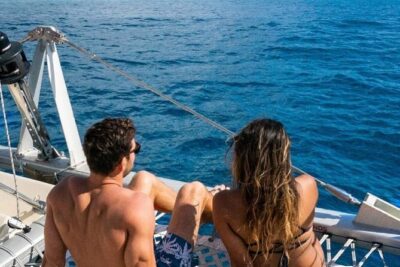
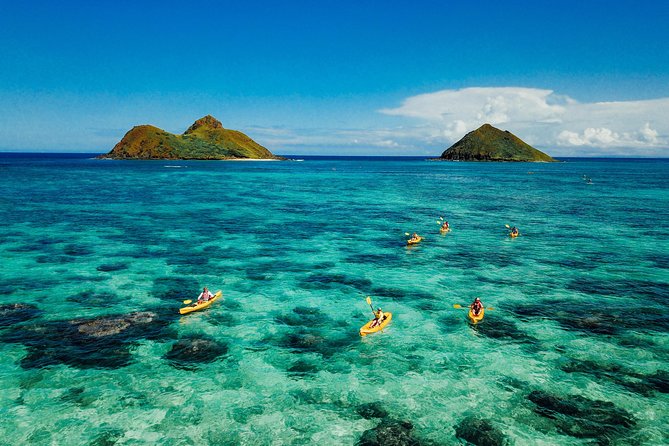
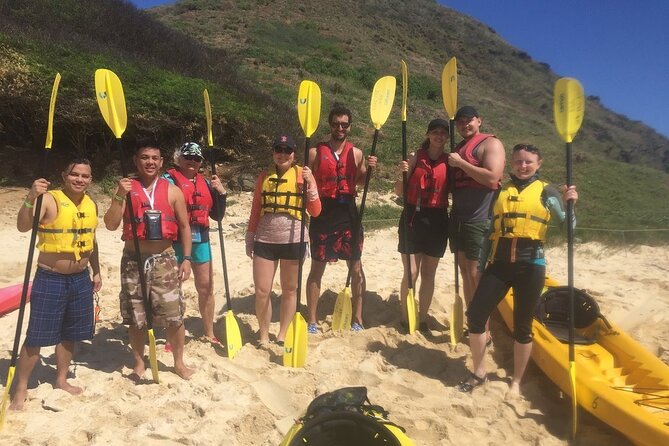
Kayaking to a bird sanctuary sounds fancy, but it’s real work too. You’ll paddle from Kailua to Mokulua Island with a naturalist guide, hike tide pools on a deserted beach, and then spend time snorkeling and swimming in Lanikai’s clear water. The day is built around wildlife viewing and hands-on water time, not just scenic stops.
I love that the tour packs in serious variety: a sea-bird sanctuary landing, a tide-pool walk to Queen’s Bath, and snorkeling gear included. I also like the small-group feel (max 8 people), which keeps questions coming and helps the guide pace the day.
One thing to consider: this is an early start and you should expect some tougher paddling, especially if the wind picks up heading out. Also, you’re doing a short walk and cart ride with the kayaks to the beach, and everyone on board needs to be able to swim.
In This Review
- Key points to know before you go
- The Early Start From Waikiki Gets You Real Water Time
- Gear-Up: Locked Valuables, Dry Bags, and a Straightforward Briefing
- The Kayaks Go to the Beach by Carts (A Small Effort With a Big Payoff)
- Paddle Out to Mokulua: Bird Sanctuary Vibes, Wind Reality
- Landing on a Protected Beach and the Tide-Pool Route to Queen’s Bath
- Snorkeling and Swimming in Lanikai’s Clear Water
- Lunch on Island Time: Simple, Filling, and Actually Helpful
- How Hard Is It, Really? Fitness, Swimming, and Wet-Weather Prep
- My best practical tip
- Naturalist Guides Who Make Wildlife Feel Personal
- Small-Group Size Keeps the Day Comfortable
- Price at $275.12: Is It Good Value?
- Where to Meet and How the Day Runs Back to Kailua
- Should You Book the Kailua Twin Islands Guided Kayak Tour?
- FAQ
- How long is the Kailua Twin Islands Guided Kayak Tour?
- What’s included in the price?
- Do I need kayaking experience?
- Do I have to be able to swim?
- Where do we meet, and is there hotel pickup?
- What should I bring?
- What happens if the weather is bad, or I need to cancel?
Key points to know before you go
- Mokulua Island sea-bird sanctuaries: guided eco-tour on a protected landing area
- Queen’s Bath tide-pool hike: a real, do-it-on-foot stretch, not just “look from the water”
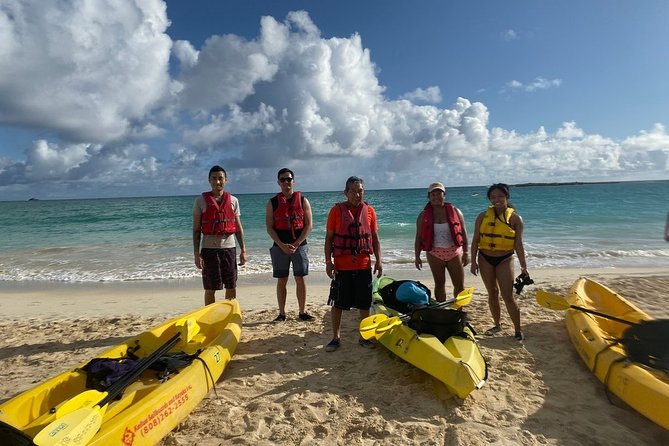
- Small group of up to 8: more attention and easier decision-making in the water
- Lunch on the island: deli sandwich plus drinks and healthy snacks to keep your energy up
- Snorkeling gear included: you can go from kayaking to snorkeling without extra planning
- Plan for wet time: swimsuit-under-clothes check-in and water-friendly footwear matter
The Early Start From Waikiki Gets You Real Water Time
This tour runs as a full day, but the best part is that it doesn’t waste daylight. If you’re staying in Waikiki, pickup is typically between 7:30 and 8:30 AM, so you’re on the water early enough to enjoy clearer conditions before the day heats up.
If you’re handling your own transport, you check into the shop at 9:00 AM. Either way, the timing is set up for one big rhythm: paddle out, land and explore, snorkel and swim, then paddle back before you return to the shop in the early afternoon.
You can also read our reviews of more guided tours in Oahu
Gear-Up: Locked Valuables, Dry Bags, and a Straightforward Briefing
When you arrive, you get introduced to your kayak guide and naturalist guide. You’ll be outfitted with the essentials: life jackets (PFDs), lockers for valuables, dry bags, and snorkel gear. You’ll also get a briefing on the area plus basic kayaking instruction, so you’re not guessing once you’re in the kayak.
There’s a real practical advantage to this gear setup. You’ll be wet and moving, so having lockers and dry bags reduces the stress of trying to keep phones and keys dry. The tour also includes island landing permits, which matters because you’re going to a protected, regulated area, not an open “anyone can wander” beach.
The Kayaks Go to the Beach by Carts (A Small Effort With a Big Payoff)
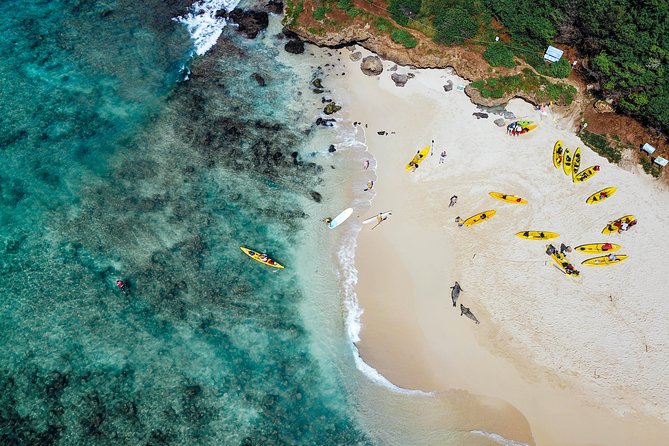
Here’s one logistics detail that can surprise first-timers. Since commercial access has limits around Lanikai, you’ll help transport your kayak from the shop area to the beach using carts and a short walk. Plan on about a 5–10 minute walk portion.
This is not the hard part of the day. It’s just enough movement to remind you that you’re doing a real activity day, not a bus-and-chair day. If you wear water shoes you can walk in comfortably, this becomes a non-issue.
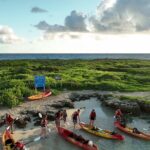
Paddle Out to Mokulua: Bird Sanctuary Vibes, Wind Reality
Once you launch, the open-water paddle to the Twin Islands area is about an hour one-way. It’s long enough to feel like a workout, but it’s also guided and paced so you’re not white-knuckling the whole time.
I like that this section sets expectations upfront. Even with good weather, you may feel wind heading out, and the current and chop can make paddling more demanding than it looks on postcards. The good news is that your guide is there to help you read conditions and keep the group moving safely.
This is also the part where you start noticing what makes the area worth it. You’re not just paddling through “water”, you’re heading to a sea-bird sanctuary landing where wildlife and shoreline ecology become the main event.
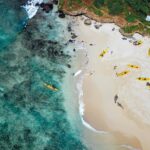
Landing on a Protected Beach and the Tide-Pool Route to Queen’s Bath
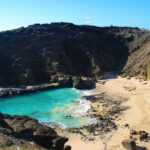
You land on the islands on a deserted beach and shift into eco-tour mode. The naturalist guide leads an exploration that includes a tide-pool hike to Queen’s Bath. This is a key moment in the day because it’s the bridge between kayaking and the more intimate side of island nature, small living things, rocky textures, and tide-level changes you can actually see and touch.
Queen’s Bath is the standout feature. It’s a natural salt pool area, and on the day it’s accessible, it’s exactly the kind of place that turns a “fun activity” into a memory. Some guides encourage everyone to spend time there based on conditions and safety, and people often use the time to wade carefully or swim when possible.
A practical note: you should expect uneven rock and wet surfaces during the tide-pool walk. If you go without grippy water shoes, you’ll feel it. Strong-soled footwear is a smart move.
You can also read our reviews of more tours and experiences in Oahu
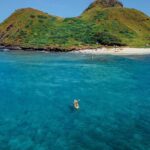


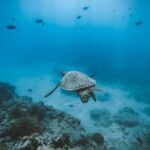
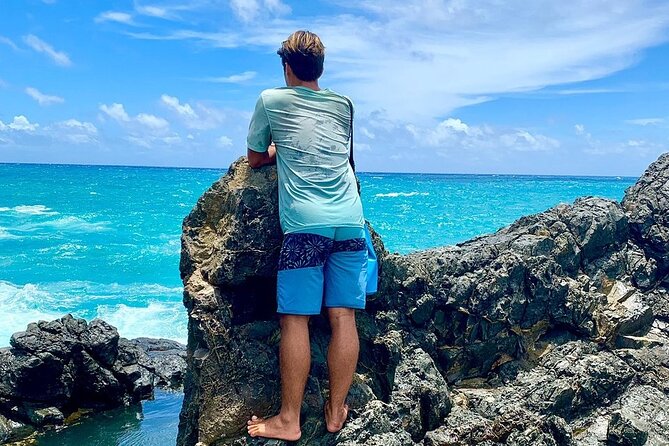
Snorkeling and Swimming in Lanikai’s Clear Water
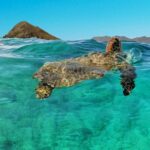
After lunch, the tour shifts again, from hiking and tide pools back into water time. You’ll have access to snorkeling equipment, and you’ll use it in the Lanikai area during the free time. This is where the day can feel extra rewarding, because you’re not just watching from the kayak, you’re looking closely at fish and reef life up close.
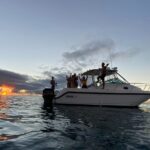
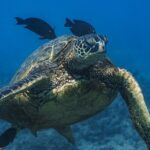
Based on what I’ve learned from past guide-led sightings on this route, you might spot sea turtles when the conditions and visibility cooperate. One review also mentioned seeing a WWII-era P-47 underwater, which is the kind of bonus detail that makes snorkeling feel like more than “just fish.”
If conditions are right, the guide may also offer kayak surf time. That’s optional and depends on wind and wave setup, so keep your expectations flexible. Even without surfing, you still get enough swim-and-snorkel time to feel like you used the gear you paid for.
Lunch on Island Time: Simple, Filling, and Actually Helpful
Lunch is included and served with a handmade deli sandwich plus drinks and healthy snacks. Dietary restrictions are accommodated if you request them at booking, including vegetarian and vegan options.
What I like about this lunch setup is timing. You eat right before your return water time, so you’re not running the second half of the paddle on empty. Multiple guides on this kind of trip also know that lunch is part nutrition and part morale, people relax more when they can stop moving and eat something that isn’t just a protein bar.
You also get energy for snorkeling after lunch. The day’s pacing matters: paddle, land and hike, then eat, then swim again. That structure keeps the time from feeling like one long grind.
How Hard Is It, Really? Fitness, Swimming, and Wet-Weather Prep
This tour is built for fit and adventurous kayakers, but it does not require prior kayaking experience. Moderate physical fitness is recommended, and the big non-negotiable is that you must be able to swim.
I think this is where you should be honest with yourself. If you can comfortably swim, you’ll feel much calmer when the guide says it’s time to get in the water or when the surface gets choppy. If swimming is not comfortable for you, this tour isn’t a good match.
Also plan for wet time. You should wear your bathing suit under your clothes for check-in, and you’ll need footwear that can get wet. Towels and a change of clothes are recommended, and the tour includes shower facilities at the shop after you return.
My best practical tip
Bring (or wear) water shoes with a solid grip. You’ll use them on the island walk, in and out of the kayak, and likely during snorkel entry.
Naturalist Guides Who Make Wildlife Feel Personal
The guides are a big reason this tour earns top scores. You’ll have a professional kayak guide and a naturalist local guide, and they’re there to explain what you’re seeing while you move through the environment.
A few named guides show up repeatedly in the experience: Tommy, Isaac, Austin, Will, Mike, Jay, and Goose. Different people have different strengths, but the consistent theme is that they bring context, wildlife behavior, island ecology, and some of the Hawaiian cultural and historical framing behind the places you paddle to.
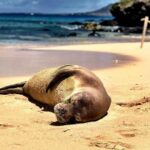
This is also where you get lucky on wildlife encounters. Past trips have included sea turtles, monk seals, nesting birds, crabs, and fish. You’re not guaranteed every animal every day, but the guides are clearly set up to help you spot what’s there and understand why it matters.
Small-Group Size Keeps the Day Comfortable
With a max group size of 8 travelers, this doesn’t feel like a conveyor-belt tour. I like that it stays flexible, especially during transitions like kayaking surf time, snorkeling, and deciding how long to spend around Queen’s Bath.
Smaller groups also help with safety and pacing. If you’re slower, the guide can adjust without turning it into a stress test. If you’re eager, you still get time to explore within the tour’s structure.
Price at $275.12: Is It Good Value?
At $275.12 per person, you’re paying for a lot more than a rental kayak. The tour includes professional guidance, landing fees, snorkeling equipment, lunch (with drinks and snacks), lockers, and access to shower facilities when you’re done.
It’s also premium because the experience is small-group and because you’re going to regulated landing areas. The time on the water is meaningful: it’s about 5 hours total with a long paddle segment. That means you’re not just getting “a quick taste” and then watching others play in the water.
One reality check: reviews include a complaint from someone who felt the pacing wasn’t what the advertising implied, and that they ended up on a shorter kayak option. So if you’re specifically aiming for maximum open-water paddling time, be clear with the company before you commit, and stay aware that conditions can change how the guide safely runs the day.
Where to Meet and How the Day Runs Back to Kailua
The start and end times are built around getting you back before afternoon fatigue wins. You’ll return to the shop around 2:30 PM, use shower facilities, change into dry clothing, and then you’re typically on your way by 3:00 PM. Hotel return is around 3:30 PM for the Waikiki pickup.
Your meeting point is 130 Kailua Rd, Kailua, HI 96734. If you want to buy last-minute essentials, the beach center shop sells practical accessories like sunscreen, UV shirts, and waterproof cameras.
Weather matters here. The experience requires good weather, and if it’s canceled due to poor conditions, you’ll be offered a different date or a full refund. Since this is open-water kayaking, your comfort and safety depend on the day’s setup.
Should You Book the Kailua Twin Islands Guided Kayak Tour?
Book it if you want a hands-on nature day: kayaking plus tide pools plus snorkeling, guided by a naturalist. It’s a good fit for couples, solo travelers, and families who can swim and are ready for a real workout and a wet day.
Skip it if you want mostly lounging time, or if swimming is hard for you. Also think twice if you’re uncomfortable with windy paddling on open water, because the trip out can feel tougher than you’d expect on a calm-looking ocean day.
If you like wildlife and want context, this tour has a real edge. Between sea-bird sanctuary stops, Queen’s Bath, and snorkeling time with included gear, it’s the kind of day that feels active, not just scenic. And at a small group size, the guide can actually tailor the experience to your pace.
FAQ
How long is the Kailua Twin Islands Guided Kayak Tour?
The tour is listed at about 5 hours total.
What’s included in the price?
It includes island landing fees, a professional guide, lunch (deli sandwich plus drinks and healthy snacks), snorkeling equipment, and secure lockers.
Do I need kayaking experience?
No experience is necessary, though it’s recommended. A moderate physical fitness level is required.
Do I have to be able to swim?
Yes. All guests must be able to swim.
Where do we meet, and is there hotel pickup?
You’ll either be picked up from your hotel in Waikiki between 7:30 and 8:30 AM, or you can check into the shop at 9:00 AM. The meeting point is 130 Kailua Rd, Kailua, HI 96734.
What should I bring?
Wear your bathing suit under your clothes for check-in. Bring footwear that can get wet, and consider packing towels and a change of clothes. The tour provides showers at the shop after.
What happens if the weather is bad, or I need to cancel?
The experience requires good weather. If it’s canceled due to poor weather, you’ll be offered a different date or a full refund. You can cancel for a full refund up to 24 hours in advance; within 24 hours, the amount paid is not refunded.