REVIEW · HONOLULU
Manoa Falls Rainforest & Self-Guided Hike
Book on Viator →Operated by Kaimana Tours · Bookable on Viator
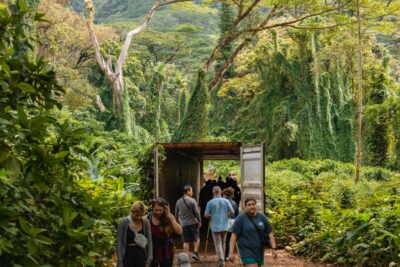
A waterfall hike with muddy shoes built in. The Manoa Falls self-guided hike is a great way to swap city sidewalks for Oahu’s rainforest, with a real payoff at the base of a 150-foot cascade. I like that you get water, bug spray, and a walking stick for the rocky climb and slippery return. One thing to plan for: this trail can feel steep and uneven, so you’ll want to move at your pace.
What makes this experience smart is the combination of freedom and support. You hike on your own (no rope, no group herding), but you still get practical help before you start, plus round-trip shuttle from select Waikiki hotels. The whole outing runs about 3 hours 30 minutes, which fits nicely into a morning or early afternoon without swallowing your entire day.
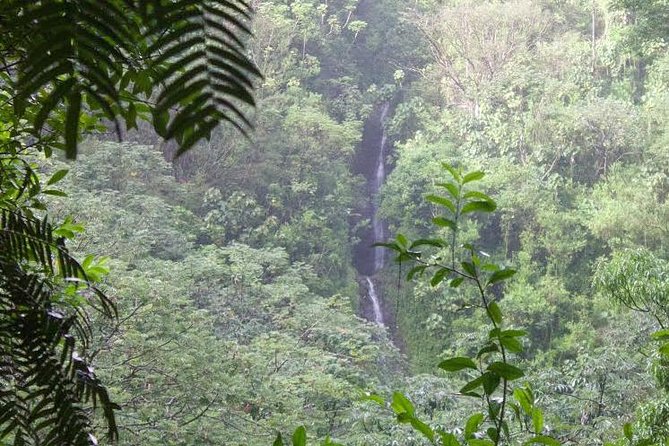
Also, manage expectations on the waterfall. Manoa Falls flow depends on recent rain, and some days it can be thinner than you hope. Still, the rainforest walk itself is the main event: eucalyptus groves, a footbridge and small stream along the way, and plenty of chances for bird and plant spotting (one highlight people talk about is hearing a cockatiel at the start).
In This Review
- Key highlights that actually matter
- Why Manoa Falls works so well as a self-guided rainforest hike
- The trail reality: uneven rocks, stairs, and a gentle-but-real climb
- Getting to Manoa Falls from Waikiki: shuttle convenience vs self-parking
- What you receive at the start: the small items that prevent big problems
- The hike to the falls: what the route feels like mile by mile
- Manoa Falls itself: why some days feel amazing and other days feel thin
- Mosquitoes, mud, and “moderate fitness” meaning real work
- Price and value: is $52.99 fair for what you get?
- Who should book this hike (and who should consider another plan)
- Should you book the Manoa Falls self-guided hike?
- FAQ
- FAQ
- How long is the Manoa Falls hike?
- Is the hike guided?
- What’s included besides the shuttle?
- Do I need to be in Waikiki for pickup?
- Is swimming allowed at the falls?
- What fitness level do I need?
- What if I want to cancel?
Key highlights that actually matter
- Shuttle from select Waikiki hotels for an easy round trip, so you’re not budgeting time for parking or navigation
- Water, bug spray, and a walking stick handed to you before you start the hike
- A self-guided trail where you control your pace on unpaved, rocky sections with stairs and boulder climbing
- Rainforest scenery on a short-ish route (about 0.8 mile / 1.3 km one way referenced, with the hike commonly described as around 2 miles total)
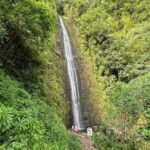
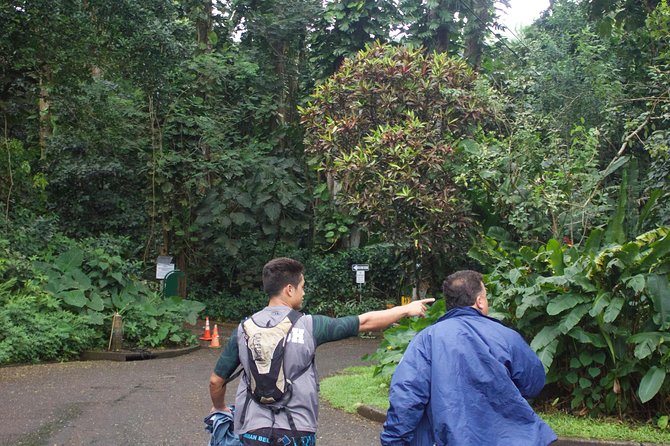
- A 150-foot waterfall finish that changes with weather, so you’re planning for a natural result, not a guaranteed spray zone
Why Manoa Falls works so well as a self-guided rainforest hike
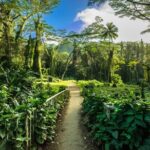
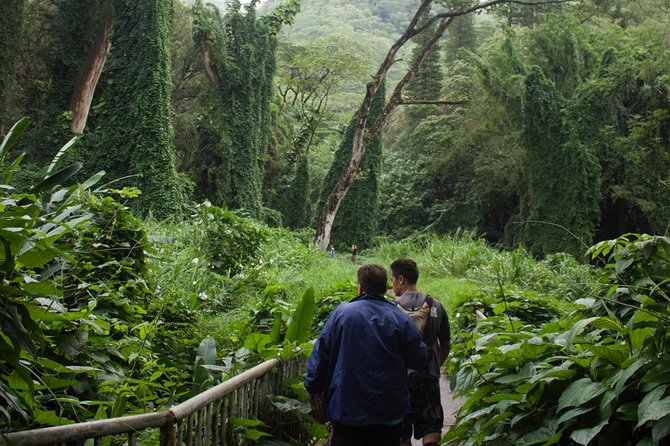
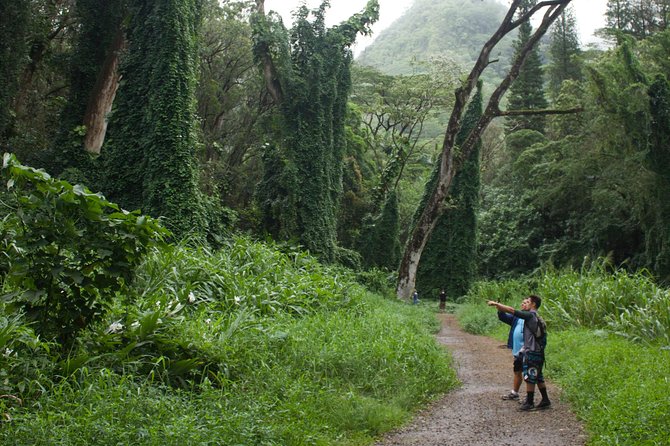
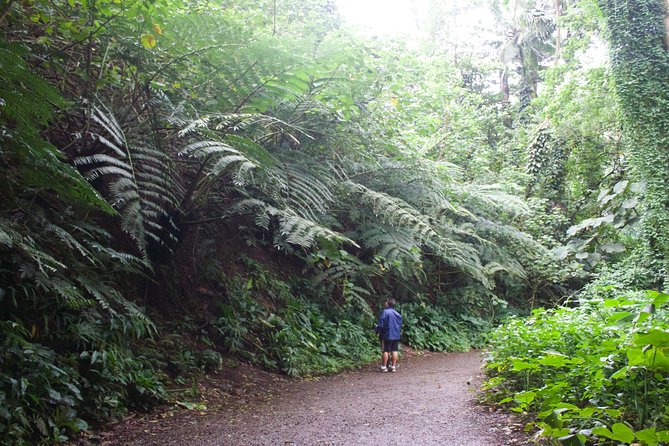
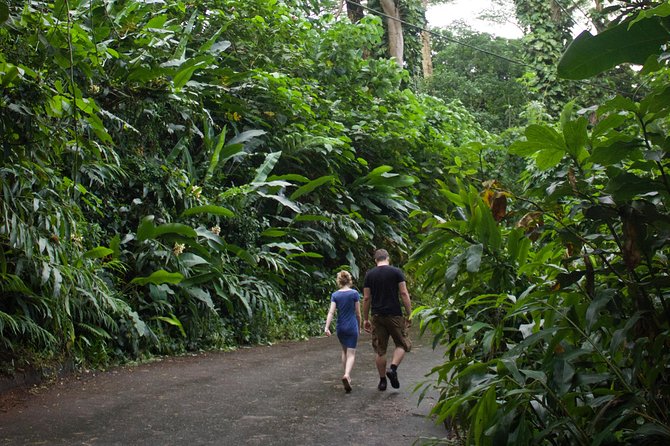
Manoa Falls is popular for a reason. It’s close enough to Honolulu for a half-day outing, yet you still get that classic Hawaii feeling: humid air, leaves everywhere, and a trail that makes you slow down without trying. The hike takes you through lush eucalyptus groves and along natural features like a footbridge and small stream, which breaks up the effort and keeps your eyes busy.
The self-guided format is also the practical part. You don’t need to coordinate around a group pace, and you can stop to take photos when the trail gives you a good angle. That matters here because the terrain is uneven. If you’re steady on your feet, you’ll enjoy the rhythm of stepping around rocks and roots. If you’re not, the freedom to go slowly becomes a feature, not a frustration.
The other big win: you’re not going in totally cold. The start includes directions plus the essentials you’d otherwise have to carry (water, bug spray, and a walking stick). That lowers the mental load. You can focus on the hike instead of improvising supplies.
You can also read our reviews of more guided tours in Honolulu

The trail reality: uneven rocks, stairs, and a gentle-but-real climb
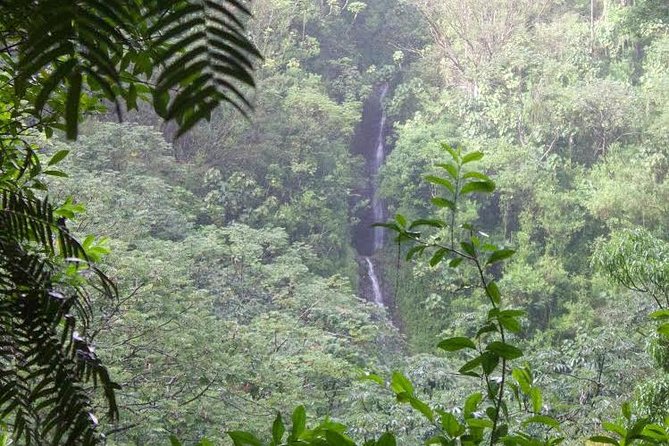
You’re looking at a moderate hike with a steady rise toward the falls. The route is often described as about 2 miles total, and it includes the kind of sections that feel more like “rock scramble with a path” than “nice park stroll.” Expect unpaved ground, rocky sections, stairs, and spots that can involve boulder climbing near the waterfall area.
Here’s how that translates for your body. Even when the grade feels manageable, the surface makes it harder. Wet river rocks, loose pebbles, and uneven steps turn an easy distance into a workout. People who enjoy hiking tend to say the hardest part is the uphill plus the footing, especially after rain.
The good news is you’re not doing this blind. A walking stick is provided, and it’s there for more than show. On the way down, it helps you test each step before you commit your weight. Many folks find it essential once the rocks are slick.
What to wear is not a suggestion. Sneakers with decent grip work best, and you’ll want comfortable clothes you don’t mind getting muddy. If your feet are sensitive, skip fashion footwear and go for something enclosed. Some people treat hiking boots as optional, but slipping is the theme of the trail, so traction matters more than brand.
Getting to Manoa Falls from Waikiki: shuttle convenience vs self-parking
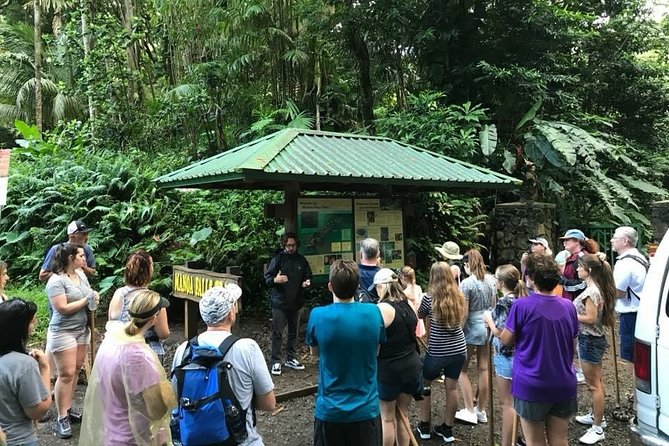
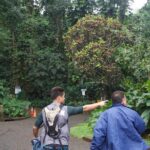
This is built for ease from Waikiki. You get round-trip transportation by shuttle from select Waikiki hotels, and the drive itself can be part of the experience. On past trips, drivers have shared local stops and cultural tidbits en route, including stories linked to Obama’s early life (a driver named Orlando pointed out details like Obama’s first job at Baskin Robbins and locations tied to his birth certificate) and movie-location facts around the area (including references to The Rock’s schooling).
One reason the shuttle is worth thinking about: it reduces the “logistics tax.” You don’t have to hunt parking, manage transport time, or time the return. Also, the tour is limited to a maximum of 40 people, which helps keep things organized.
If you’re not staying in Waikiki, you still have an option: there’s free parking at 2805 Monsarrat Ave, Honolulu, HI 96815, and you walk to the Queen Kapiolani Hotel for shuttle pickup. The key practical note is timing. The shuttle won’t wait for late arrivals, and the driver makes multiple stops, so you should plan a small arrival window rather than assuming you’ll be first pick-up.
What you receive at the start: the small items that prevent big problems
The “included” list looks basic until you’re standing on a muddy trailhead in humid air. Then it makes sense. Before you hike, you’re provided with:
- Bottled water
- Bug spray
- A walking stick
- Directions for the self-guided portion
- National park fees
Water matters because this isn’t a flat hike where you can coast. You’re working uphill over uneven ground, and humidity can make you feel thirstier than you expect. People often mention the mosquito presence, too, so bug spray isn’t optional if you’re sensitive.
The walking stick is the underrated piece. On uneven slopes and rocky steps, it helps you balance and reduce slip risk. Even if you feel strong on the way up, the return can be trickier because your legs get tired and the footing gets more slippery. Multiple people made the same point: use the stick seriously on the descent.
Also note the safety rules at the falls area: swimming isn’t safe, and drinking the water is prohibited. That’s important for planning photos and expectations. You’re there for the hike and the view, not a splash session.
The hike to the falls: what the route feels like mile by mile
Once you’re dropped at the trailhead, your job is simple: follow the directions and go at your pace. Most people aim for roughly two hours on the trail portion (some mention 2 hours being more than enough at a moderate fitness level). That time accounts for the uphill, the rocky sections, and a break or two at the waterfall area.
As you start into the rainforest, it’s mostly about rhythm and attention. You’ll likely notice lots of unusual flowers and birds, and you may hear birds calling from the canopy. One memorable detail people share is the sound of a cockatiel early on, like it’s laughing.
Midway through, you start dealing with the “rocks and rain” reality. Some days are muddy with wet trail conditions. When it rains on and off, slippery footing can make the hike feel harder than the distance suggests. If you know you handle uneven ground well, you may cruise. If you don’t, plan extra time and take your turns slowly.
Near the waterfall area, it can get more challenging. There’s a section that some people describe as a “very challenging” hike at the end, even if the rest of the trail is manageable. This is where a walking stick earns its keep.
You can also read our reviews of more tours and experiences in Honolulu

Manoa Falls itself: why some days feel amazing and other days feel thin
The falls are the headline, but weather controls the show. Manoa Falls flow varies with rainfall. In dry conditions, the waterfall can look thin or even disappoint if you were picturing a heavy curtain of water. On wetter days, people report stronger flow and say it’s a better experience in the winter rainy season.
So what should you do with this info? Don’t chase an exact outcome. Instead, plan to enjoy:
- The final approach through the densest part of the rainforest
- The feeling of reaching a real waterfall base
- Photos that focus on the surrounding greenery and the falls’ shape, not just volume
If you’re going on a period with little rain, go in mentally prepared for a quieter waterfall. Many people still describe the falls as worth it because the hike and the setting are the point.
And if you’re the type who needs a guaranteed waterfall moment, you might prefer a plan built around weather flexibility. With this hike, you’re choosing nature over control.
Mosquitoes, mud, and “moderate fitness” meaning real work
This trail is not wheelchair-friendly and it’s not built for very young kids. It’s listed as not recommended for children under 3, and it’s also not recommended for people with disabilities. Age-wise, it’s also not recommended for ages older than 65. The fitness requirement is “moderate,” but the word moderate here doesn’t mean gentle. It means you can handle uneven terrain and a steady uphill.
Mosquitoes show up, often a lot. People explicitly warn about them and recommend using bug spray and wearing leggings. If you’re the kind of person who gets itchy fast, treat bug management like part of the hike, not an afterthought.
Then there’s mud. Even if it doesn’t rain hard right at the moment you go, the rainforest environment can leave the trail wet. Bring footwear that handles slick rocks, and consider clothes you’re fine getting damp and muddy.
Price and value: is $52.99 fair for what you get?
At $52.99 per person (about 3 hours 30 minutes), you’re paying for the combo: shuttle, park fees, and the essentials that make the hike safer. The hike itself is self-guided, so the value isn’t about a full guided ranger program on the trail. It’s about making the hike easy and supported, without needing to organize everything yourself.
A key value point: national park fees, water, bug spray, and the walking stick are included. Those are real costs and real convenience. Also, the shuttle saves you time and hassle, especially if you’re staying in Waikiki and don’t want to coordinate a car for a half-day activity.
Is it worth it compared with driving yourself? If you live close, can park easily, and don’t mind figuring it out, DIY might feel cheaper. But if you want a smooth morning with minimal planning and you’d rather not deal with parking stress, the price starts to make more sense quickly.
The other value angle is risk management. The terrain is rocky and slippery. A provided walking stick plus basic safety guidance is not fluff. It’s the difference between “I got through it” and “I slipped and regretted it.”
Who should book this hike (and who should consider another plan)
This is a great fit if you:
- Want a short rainforest outing with a real goal at the end
- Like nature photos and bird/plant watching
- Hike occasionally and can handle uneven ground
- Prefer self-guided freedom but still want useful support items
You might think twice if you:
- Don’t handle steep or slippery trails well
- Need fully accessible terrain
- Are traveling with very small kids (under 3) or anyone who can’t safely navigate rocky steps
If you’re older (over 65), the hike isn’t recommended here. That doesn’t mean you can’t enjoy Hawaii nature, but it suggests you’ll want an alternative trail with easier footing.
Should you book the Manoa Falls self-guided hike?
Book it if you want a practical, half-day way to experience a real Honolulu-area rainforest and reach a waterfall goal without planning a bunch of logistics. The shuttle from Waikiki, included park fees, and the starter kit of water, bug spray, and a walking stick are the strongest reasons this is a worthwhile purchase.
Skip or rethink it if your top priority is a guaranteed, heavy waterfall show every day. Manoa Falls changes with rainfall, and that’s part of the deal. Also, respect the terrain. If you’re not comfortable with uneven, wet rock, this won’t be a relaxing stroll.
FAQ
FAQ
How long is the Manoa Falls hike?
The overall experience runs about 3 hours 30 minutes.
Is the hike guided?
It’s self-guided. Transportation and directions are provided, but you hike at your own pace.
What’s included besides the shuttle?
You get national park fees, bottled water, a walking stick, and bug spray.
Do I need to be in Waikiki for pickup?
Pickup is available from select Waikiki hotels. If you’re not staying in Waikiki, there’s free parking at 2805 Monsarrat Ave and you walk to the Queen Kapiolani Hotel for shuttle pickup.
Is swimming allowed at the falls?
No. Swimming isn’t safe. Drinking the water is also prohibited.
What fitness level do I need?
You should have a moderate physical fitness level, since the trail includes unpaved, rocky sections, stairs, and boulder climbs.
What if I want to cancel?
You can cancel for a full refund up to 24 hours in advance of the experience start time.