REVIEW · OAHU
From Waikiki: Best of Oahu Photo Tour with Pickup
Book on GetYourGuide →Operated by Oahu Photography Tours · Bookable on GetYourGuide
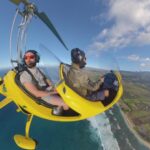
Want killer Oahu photos without a rental car? This small-group photo tour runs you along some of east Oahu’s most photogenic stops, guided by a professional photographer who helps you turn quick viewpoint time into real keepers. I like that you’re not stuck at one scenic pull-off either, you get a full run of lookouts and coastline angles, from Waikiki’s high views to the Halona area’s dramatic sea cliffs.
I also love the hands-on teaching. Whether you’re shooting with a DSLR, mirrorless, or just your phone, the guide style here is practical: you’ll get coaching on settings and composition, with lots of praise for guides like Andrew, Emily, and Kurt (names that keep coming up). You’ll be able to copy the approach on your own even after the van drops you back.
One thing to plan for: food and water are not included. Lunch happens at a local place in Waimānalo, but you’ll be paying for what you order, and you’ll want your own water (sunscreen too), since the tour doesn’t provide it.
In This Review
- Key points to know before you go
- East Oahu views that make your camera work overtime
- Pickup in Waikiki: quick start, but confirm your exact pull-up spot
- What “bring any camera” really means for your photos
- Nuuanu Pali to secret stop: the day starts with power views
- Waimānalo Bay and the Ko‘olau Mountains: where the color pops
- Makapu‘u Point and Halona: the east-coast photo payoff
- Sandy’s Beach and Hawaii Kai: finish the day with texture and coastline
- Leonard’s Malasada treat: a sweet close to the shoot
- Price and value: is $99 for five hours a good deal?
- Who this tour suits best (and who should skip it)
- Should you book the Oahu Photo Tour from Waikiki?
- FAQ
- How long is the photo tour from Waikiki?
- How big is the group?
- Is pickup included, and where does it happen?
- What cameras can I bring?
- Are meals or water included?
- What are some of the main photo stops?
- Is Pali lookout admission included?
- Is the tour suitable for people with mobility impairments?
Key points to know before you go
- Small group (up to 7) means less waiting and more time at each stop
- Bring any camera approach covers phones as well as traditional cameras
- Short, timed photo stops (often 15–20 minutes) keep the day moving without feeling rushed
- Iconic east Oahu viewpoints include Makapu‘u, Sandy’s Beach, and the Blow Hole area
- Pali lookout admission included, so you’re not surprised by extra costs
- Waimānalo lunch and a local malasada treat give you more than just photos
East Oahu views that make your camera work overtime
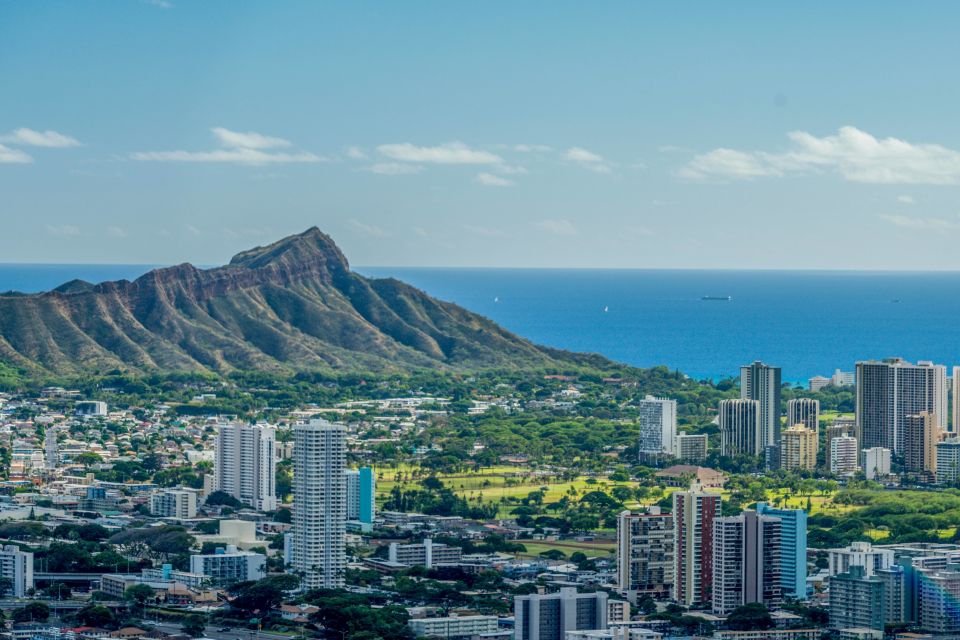
If your idea of a perfect Hawaii day is views plus a plan, this tour fits. You’ll start from Waikiki and head toward the east side of Oahu where the scenery shifts fast: ocean color changes, cliffs get steeper, and the sky seems to play along. Even if you’re not a “serious photographer,” the structure helps. You arrive at the right places, at the right angles, and you’re given enough time to actually take photos instead of rushing through.
The best part is that the tour isn’t just sightseeing. It’s designed as a guided photo session in a van-and-walk format. You’ll do short walks at a few points, then step back into the van before the session gets exhausting. That mix matters. Waikiki can feel busy and flat compared to what you’ll see next, so this feels like a change of pace without being a full-day grind.
Because the group is limited to 7 participants, you also get more personalized help. In practice, that means you can ask questions about your phone camera or your lens setup while the guide keeps the line moving.
You can also read our reviews of more photography tours in Oahu


Pickup in Waikiki: quick start, but confirm your exact pull-up spot
Pickup is included from hotels in Waikiki, which is great if you don’t want to coordinate taxis or a car. Just keep in mind one key detail: pickup happens at the designated bus pull-up area, not on the main street. That’s why the tour’s note matters, contact the provider 24 hours before to confirm your exact pickup point.
This is the sort of small logistics detail that can make a tour go smoothly or feel annoying. I’d rather you plan five minutes for a quick confirmation than show up ten minutes early to the wrong sidewalk.
The van ride is also part of the experience. You’re not doing a DIY “search for parking” day. You’re getting dropped at viewpoints efficiently, with a guide who knows where the best angles are, and you’re back in Waikiki within a reasonable time.
What “bring any camera” really means for your photos
Here’s what I’d expect from a tour like this: you’ll get coaching that helps right away. The tour description is clear that you can bring any camera you like, and the reviews back up that the teaching fits both phones and traditional cameras.
You’ll be at scenic overlooks long enough to try more than one shot. Then the guide’s job is to help you adjust what you’re doing, framing, timing, and settings, so you don’t end the day with 200 photos that all look the same.
One of the most consistently praised parts of the experience is that guides help you take better photos with devices you already own. Names like Alexsei, Mac, Malcolm, Alan, Matt, and Nui show up in the feedback, and the recurring theme is clear: the guide doesn’t just point at a view. They help you work the view.
If you’ve ever said, I know this is a great place, but my photos don’t look like what I see, this tour is built for that exact problem.
Practical tip for photo confidence: treat each stop like a short studio session. Take a few wide shots, then zoom in or step to a different angle, then take a portrait-style frame. With 15–20 minutes per viewpoint, you can test quickly and still get something you like.
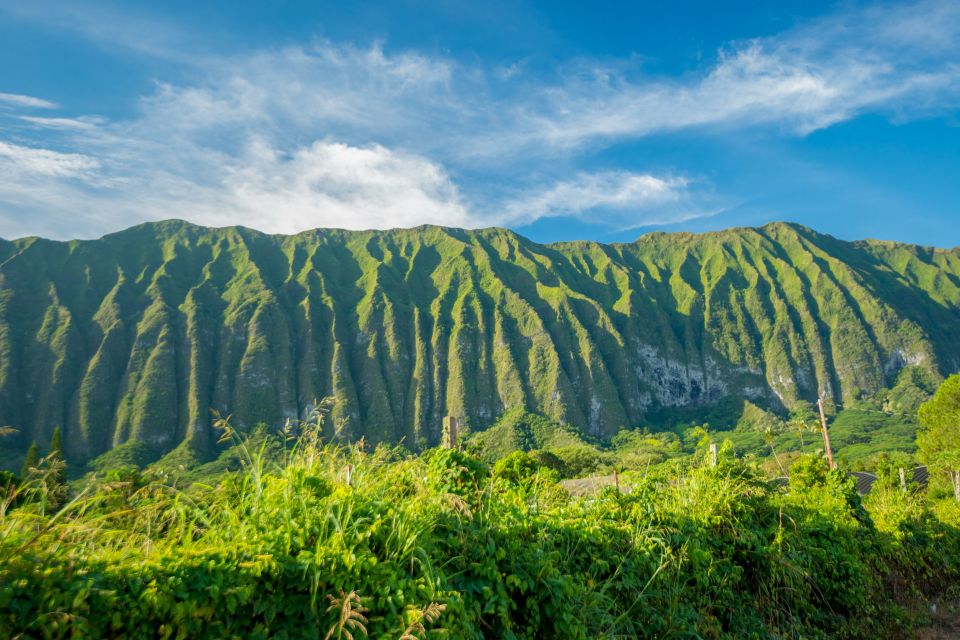
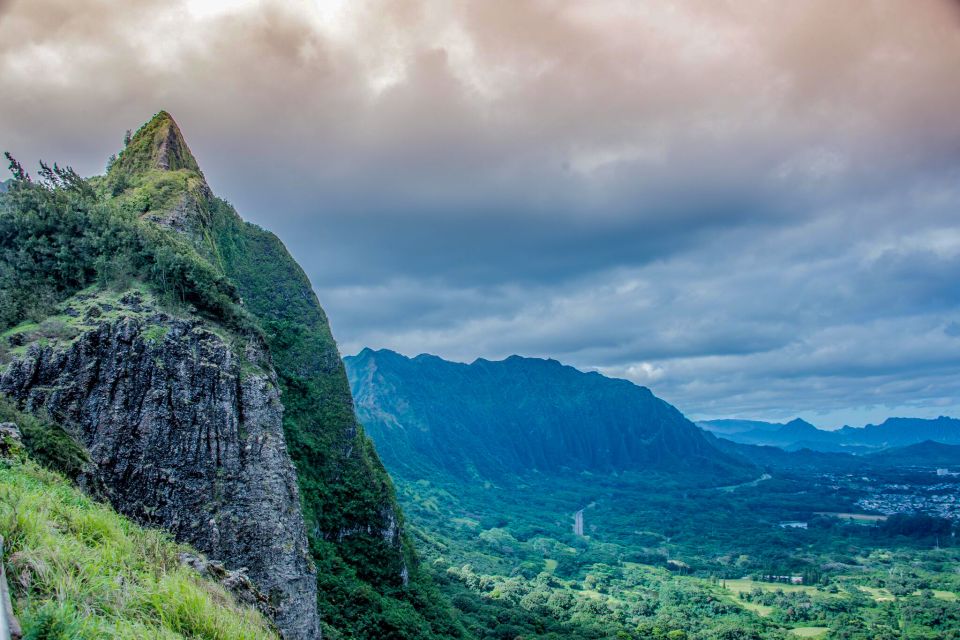
Nuuanu Pali to secret stop: the day starts with power views
The tour gets going with a first wave of photo time in the upper Honolulu area. After pickup by van, you’ll reach Nuuanu Pali Lookout for a 20-minute photo stop. This is one of those Oahu viewpoints that instantly makes you understand why people come back to the island. The angle gives you scale, ridges, valleys, and the sense that you’re looking out across a whole chapter of island geography.
From there, you’ll hit a secret stop for another 20-minute photo stop. The word secret is doing work here. Even if you’ve researched Oahu already, an extra viewpoint can help you avoid the “same photo as everyone” effect. It’s also a good place to slow down, because you’ll usually have a bit less crowd energy than the most famous spots.
Next comes Tantalus Lookout (Puu Ualakaa State Park) for 20 minutes of sightseeing and photos. This is where you can switch between ocean-and-town views and more dramatic horizon angles. It’s also a nice warm-up for photography because the light and viewpoints tend to give you options for foreground framing.
A small reality check: these early stops are short. That’s not a downside, it’s the tour’s method. You’ll be glad you moved on when the day fills with big east-coast scenery.
Waimānalo Bay and the Ko‘olau Mountains: where the color pops
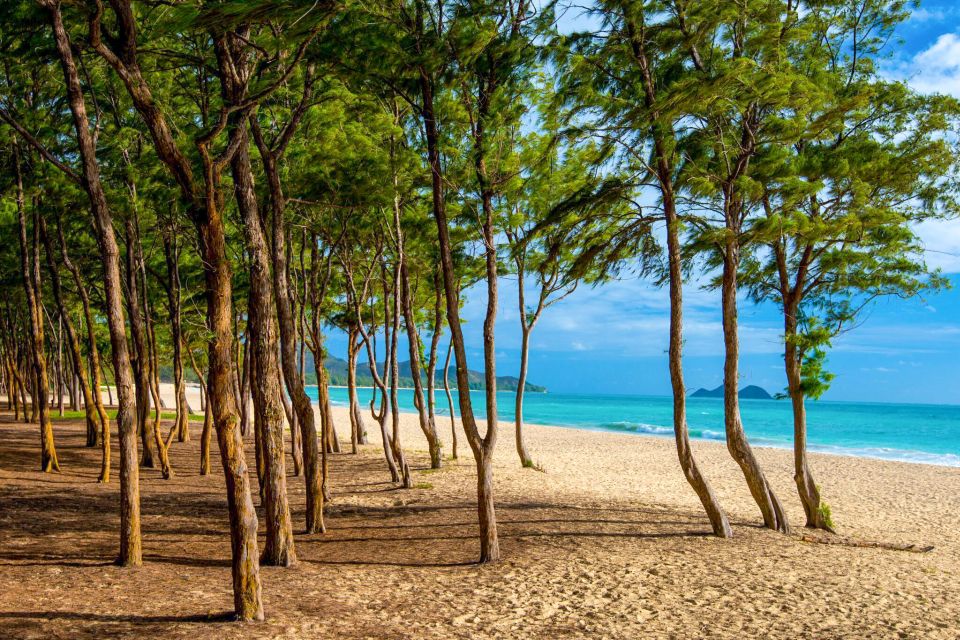
After the viewpoint stretch, the tour heads toward Waimānalo, with a photo stop around 20 minutes, and then time for views that highlight the Ko‘olau Mountains and the Waimānalo Bay area.
This is one of the best parts of the day for photographers who want a mix: ocean color, beach lines, and mountain backdrops. Waimānalo often feels calmer than Waikiki, and that calm shows up in your photos. You tend to get less visual noise and cleaner framing, especially if you can capture a little bit of breeze movement or different angles along the shoreline.
Then lunch comes in at Ono Steak and Shrimp Shack (in Waimānalo) for about an hour. The tour notes that the restaurant is not catered, which is a big practical detail. You’ll be choosing and paying for what you want. If you’re traveling with someone who gets hangry, plan for it: lunch is your built-in break, but it’s still part of a schedule.
My advice: order something that won’t slow you down. Eat, refill your water if you can, and come back ready to shoot again. If you want your photos to stay consistent, try not to go too heavy on warm drinks or super filling meals right before the next lookouts, save that for later.


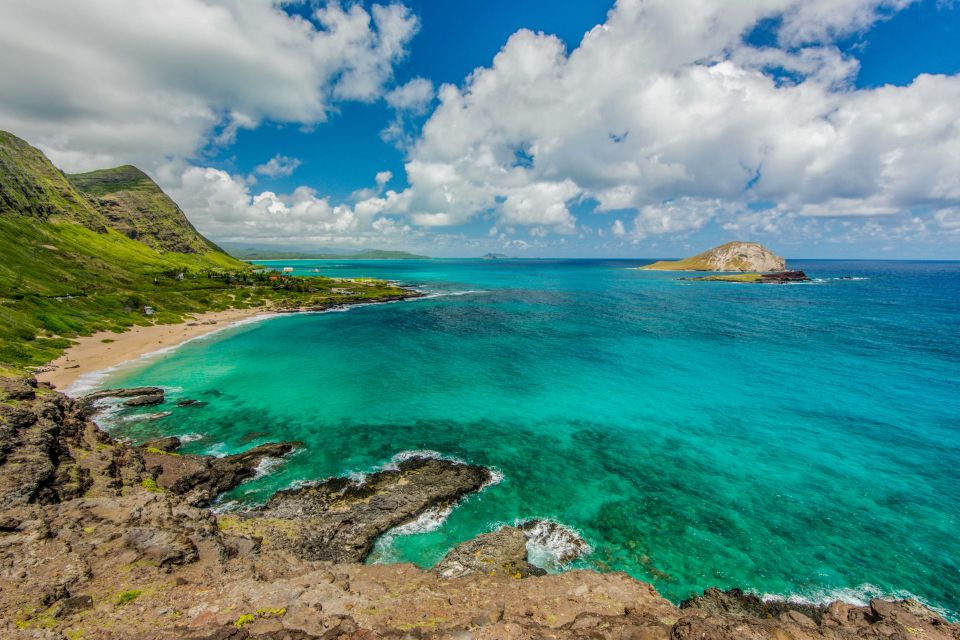
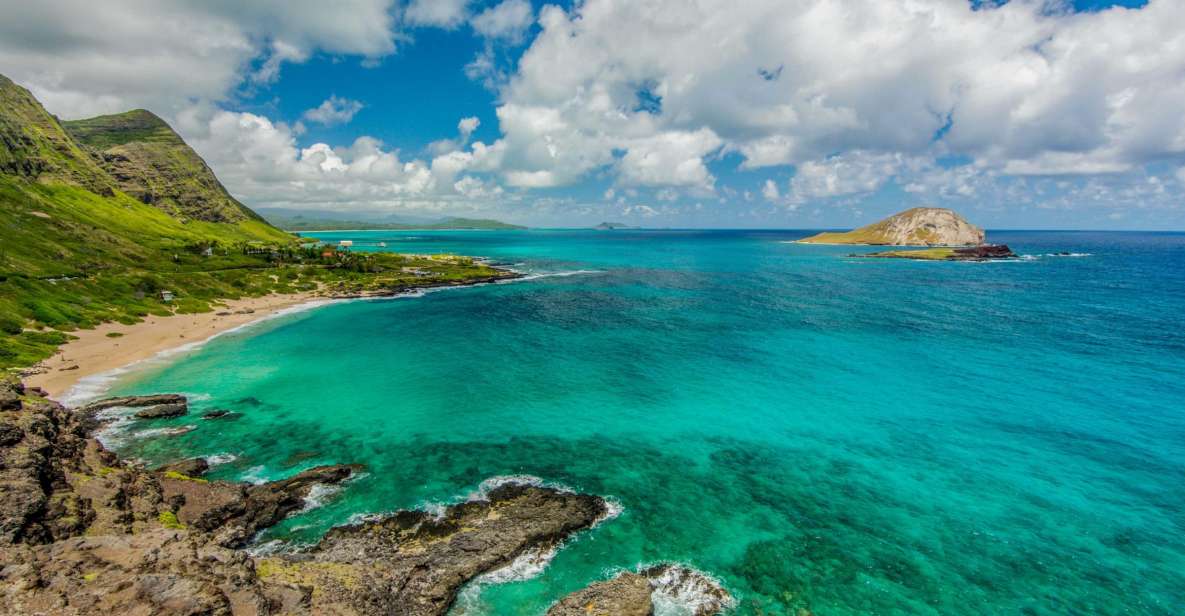
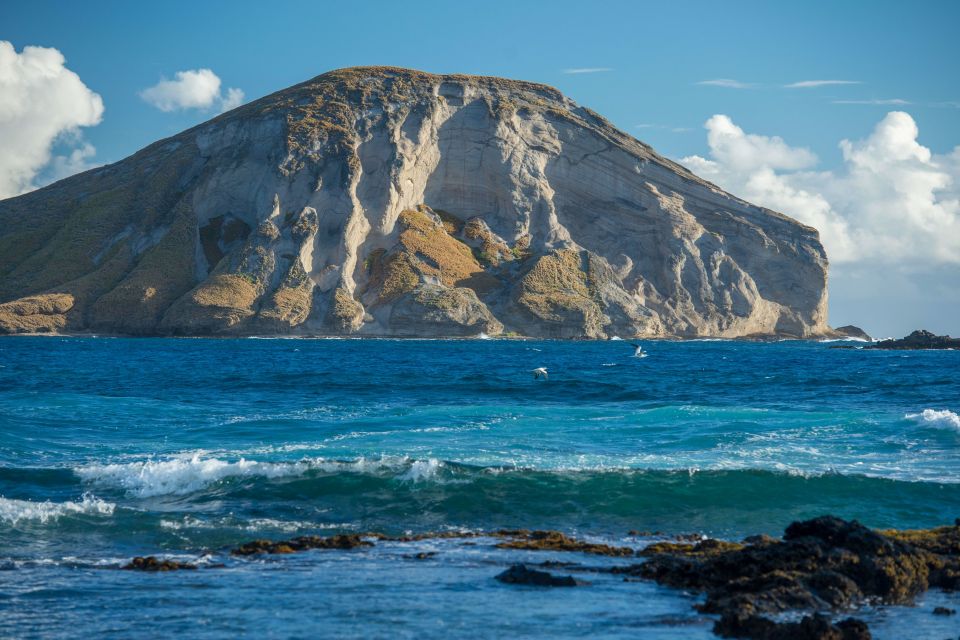
Makapu‘u Point and Halona: the east-coast photo payoff
Now we hit the payoff stretch. You’ll go to Makapu‘u Point for 20 minutes. This is where the coastline starts looking bigger and more layered. The viewpoint gives you a classic “look down the ocean” composition, and it’s a prime spot to experiment with horizon line placement and depth cues.
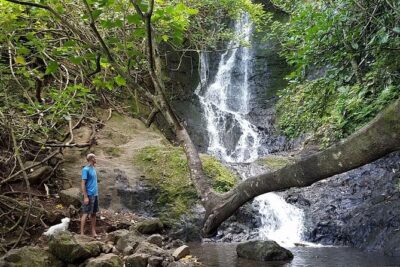
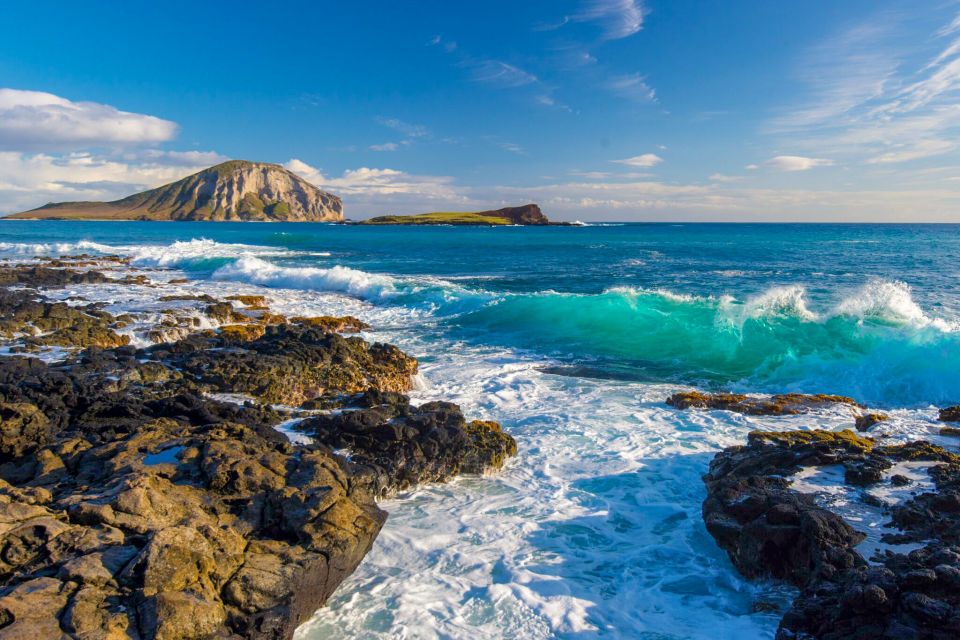
Next is Halona Beach Cove for a 15-minute photo stop, and the area connects to the Halona Blowhole, described as being formed from molten lava tubes from volcanic eruptions thousands of years ago. That geology detail matters because it gives you a reason to look beyond the obvious wave action. You’re photographing a place carved by ancient forces, not just a random seascape.
The Blow Hole area is dramatic even when the ocean isn’t at its loudest. I’d treat it like a timing game: shoot a few frames when the water pulses, then shift angles and capture the rock texture and spray. Short stop time means you should come prepared with a quick plan: wide shot first, then detail shot, then one portrait frame for variety.
If weather clouds the view, you can still get strong photos here because cloud cover often makes ocean color richer and reduces harsh glare.
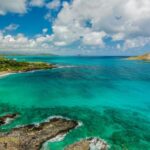
Sandy’s Beach and Hawaii Kai: finish the day with texture and coastline
After Halona, you’ll keep moving along the coast with more photo opportunities, including Sandy’s Beach Lookout for another viewpoint stop. This is the type of spot that can turn a photo day from “famous names” into “I found something special.” Even if you’ve seen pictures online, being there in person changes the texture, rock formations, shoreline curves, and the way light hits water.
Then the tour includes Hawaii Kai with another photo stop. Think of this as your final geography check, an angle that wraps up the day with a sense of where you started versus where you ended up.
This matters because it gives you a storytelling set of photos. Instead of 10 images from similar angles, you end up with variety: town-to-coast, mountain-to-ocean, and open-water angles.
Leonard’s Malasada treat: a sweet close to the shoot
To end on a local note, the tour includes a stop at Leonard’s Malasada Bakery Truck for about 20 minutes. That’s a nice way to end a photo tour because it’s not another viewpoint that requires timing and light. It’s a quick break where you can talk through your best shots and ask the guide for quick feedback on what worked.
Malasada is also a good “reward for walking” snack. You’ve been on your feet just enough, plus you’ve been focused on settings and composition. A sweet finish feels right.
Price and value: is $99 for five hours a good deal?
At $99 per person for about 5 hours, this tour is priced like a smart middle ground: not a budget bus tour, not an all-day private shoot. You’re paying for three main things:
- Pickup from Waikiki (so you don’t fight transit)
- A professional photographer guide who helps with both traditional cameras and phones
- Access to multiple high-impact viewpoints across east Oahu within limited time
You’re also getting at least one admission included stop: the Pali lookout. And the schedule is tight enough to feel efficient, but still gives enough time at each location to do more than one take.
Two costs to remember on your side: food and water aren’t included, and lunch at Ono Steak and Shrimp Shack is not catered. In other words, your total trip cost depends on what you order. But the structure is still good value because you’re not paying to enter multiple lookouts or arranging transportation.
If you’re on Oahu for a short visit, don’t have a car, and want your photos to actually improve, this is strong value.
Who this tour suits best (and who should skip it)
This tour fits best if you:
- want east Oahu highlights without driving
- care about photography, even if you’re starting from scratch
- want a small group and a guide who will help you with your camera or phone
It’s a less ideal choice if you have mobility impairments, since it’s described as not suitable for that group. Also, the tour doesn’t allow luggage or large bags, so pack light.
If you’re the type who likes structure, arrival times, set stops, and quick coaching, this will feel efficient. If you’re the type who wants to roam freely for hours, you might feel boxed in. But the stop timing is also what makes it work for most people.
Should you book the Oahu Photo Tour from Waikiki?
I’d book it if you want an easy way to get better photos while covering a lot of Oahu in a single, well-paced day. The combination of pickup, small group size, and a guide who helps you shoot with whatever you have makes it feel practical, not gimmicky.
Skip it if you hate schedules, need lots of long beach time, or can’t handle short walks and viewpoint stops. And budget for lunch and drinks since food and water are not included.
If you’re undecided, here’s the simplest test: if you’d rather spend your first Oahu day learning how to photograph the island than figuring out routes and parking, this tour is a very good bet.
FAQ
How long is the photo tour from Waikiki?
It lasts about 5 hours.
How big is the group?
It’s a small group limited to 7 participants.
Is pickup included, and where does it happen?
Pickup is included from hotels in Waikiki, but it happens only at the designated bus pull-up area, not on the main street. You should confirm your exact pickup location with the activity provider 24 hours before.
What cameras can I bring?
You can bring any camera you like, including phone cameras. The guide helps with photography tips using your device.
Are meals or water included?
Food and water are not included. Lunch is at a local restaurant in Waimānalo, and you’ll need to purchase what you want.
What are some of the main photo stops?
The tour includes stops such as Nuuanu Pali Lookout, Makapu‘u Beach lookout, Halona/Blow Hole area, Sandy’s Beach Lookout, Waimānalo Bay, and Hawaii Kai, plus Leonard’s Malasada.
Is Pali lookout admission included?
Yes, admission is included for the Pali lookout.
Is the tour suitable for people with mobility impairments?
No, it’s not suitable for people with mobility impairments.