REVIEW · OAHU
Oahu Sunrise Tour From Waikiki
Book on Viator →Operated by Blue Hawaii Photo Tours · Bookable on Viator
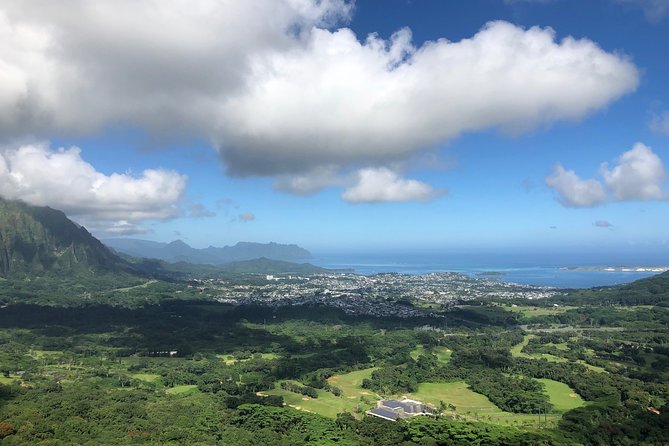
A sunrise that teaches you to see. This half-day Oahu sunrise photo tour from Waikiki has a built-in reason to wake up early: you’re guided to the east side of the island with a tripod and hands-on instruction before the horizon lights up.
I like the way the guides focus on practical photography basics, not just pointing at views. On this tour I’d expect clear help with light, framing, shutter speed, and focal points, and you can see it in how guides like Pattie, Evan, and Marie describe settings and then coach you at each stop.
One possible drawback: it’s a sunrise-first workshop, not a slow scenic drive. If you’re showing up without a working camera (or you want lots of free time and minimal instruction), the early start and the photo-focused pace may feel less worth it.
In This Review
- Quick hits: what makes this sunrise photo tour work
- Five a.m. logistics that actually pay off
- Price and value: what $100 buys on a photo-focused half-day
- Your guide matters more than you think
- Stop by stop: how the day unfolds on Oahu’s east side
- The early depart from Waikiki
- Sunrise at a beach with horizon views and tide pools
- Quick breakfast, then more east-side locations
- The framing and angles practice that makes your photos look intentional
- Tripod inclusion: why that’s more than a convenience
- Small-group attention: the difference between seeing and learning
- What to bring (and what to plan for)
- Weather, timing, and why the tour still runs
- Who this tour is best for
- Should you book Oahu Sunrise Photo Tour from Waikiki?
- FAQ
- How long is the Oahu Sunrise Photo Tour?
- Do I get pickup from Waikiki?
- Is the tour limited to small groups?
- Are tripods included?
- Do I need to bring a camera?
- Is food included?
- What time does the tour start?
- Does the tour run in bad weather?
- What’s the cancellation policy?
Quick hits: what makes this sunrise photo tour work
- Waikiki hotel pickup and drop-off in an air-conditioned van means you start without the hassle
- Small group size (up to 7 per booking, max 8 travelers) for more direct coaching at each location
- Tripods are included, so you can focus on settings and composition instead of gear
- Guided instruction at real sunrise and post-sunrise spots across the east side of Oahu
- 5-6 different shooting stops after sunrise keeps the day from turning into one-location sightseeing
- Works in all weather conditions, so you dress for damp wind and changing light
Five a.m. logistics that actually pay off
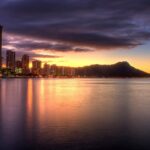
This is one of those tours where the timing is the whole point. You leave Waikiki about an hour before sunrise, then you move to a beach setting designed for dawn shots. The payoff is that you’re there as the sun clears the horizon, when the sky colors shift fast and the water is still calm enough for reflective, tidepool-friendly moments.
The pickup matters here. You’re not trying to juggle parking, finding the right meeting spot at the right time, and walking in the dark. You get round-trip hotel transport from Waikiki in a spacious, air-conditioned van, so you can arrive focused, not frazzled.
You can also read our reviews of more tours and experiences in Oahu


Price and value: what $100 buys on a photo-focused half-day
At $100 per person for about five hours, this tour lands in the “you’re paying for instruction and timing” category. You’re not just paying for a bus ride. What you’re getting is:
- A professional guide
- Use of tripods
- Round-trip Waikiki transport
- Small-group teaching across multiple stops
- A breakfast stop after sunrise (but note: food isn’t listed as included)
That last point is important for value. Food and drinks aren’t included, so plan a little extra cash for the quick breakfast stop. If you keep expectations realistic, camera coaching plus dawn access, this cost can feel fair. If you’re looking for a cheap way to see sunrise with no photo instruction, you may feel like you paid for something you didn’t use.
Your guide matters more than you think
In most photo tours, the locations matter. Here, the coaching level shows up as the real differentiator. The better guides on this tour don’t just say, Try this. They explain what the settings mean and why you’d use them in that exact lighting moment.
You’ll see that in the guide styles reported on the tour:
- Evan is praised for walking people through best camera settings at each location and helping them realize what they still have to learn.
- Marie is noted for being patient, personable, and giving individual attention based on skill level.
- Pattie gets called out for being helpful and for photographing participants during the stops so people also leave with usable portraits.
Still, one review raises a different issue: the experience can feel less welcoming if your gear is off (like arriving with a phone that isn’t really up to the job) or if you don’t get that this is explicitly a photo workshop. So bring the equipment you plan to use, and be ready to participate.
Stop by stop: how the day unfolds on Oahu’s east side
The early depart from Waikiki
You start with a pickup in a van and then drive out before sunrise. This timing is built to get you to the horizon moment, when the light is thin and dramatic. If you’ve ever tried to catch sunrise on your own, you know the hard part isn’t the view, it’s showing up in the right place at the right time.
Because it’s a workshop, you’ll be paying attention while you’re moving. That’s when you learn what you’ll likely need once you stop: tripod use, basic exposure thinking, and how the sun’s position changes the scene.

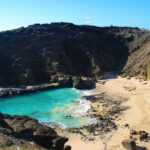


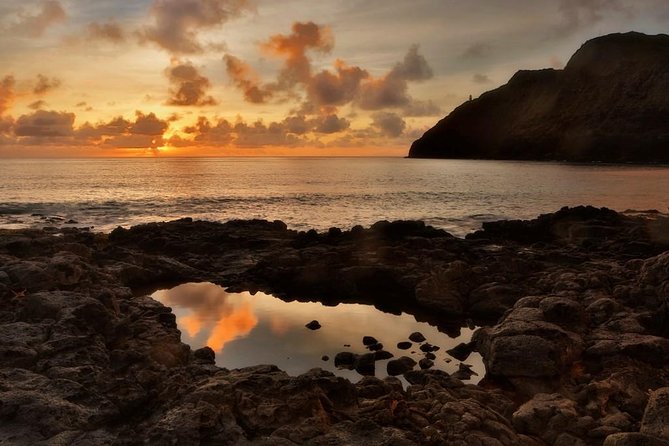
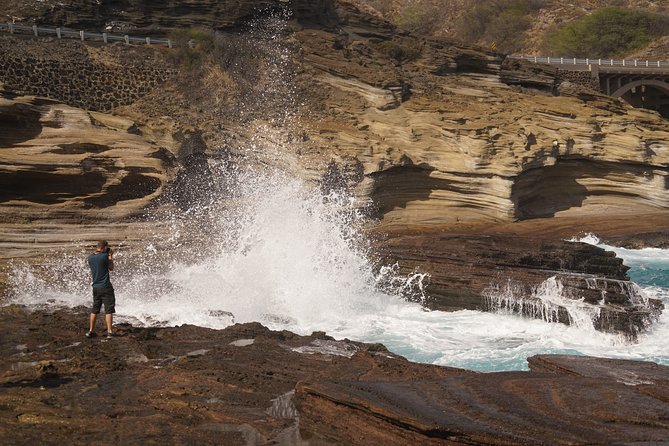
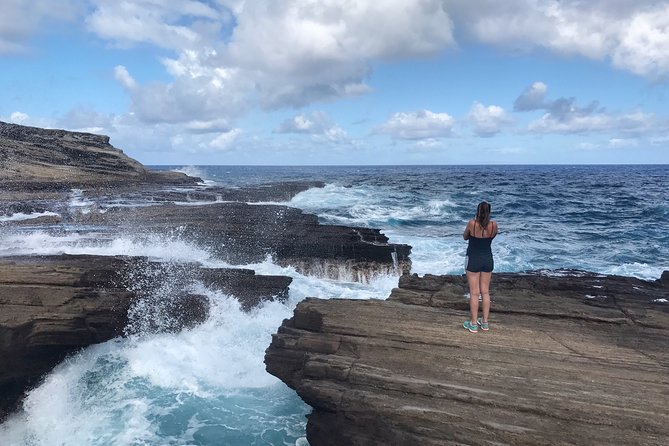
Sunrise at a beach with horizon views and tide pools
The first major photo moment is a spectacular beach viewpoint where you can see the sun as it appears on the horizon, with splashing waves and tide pools. This matters because tide pools and wet sand can act like natural mirrors. When the light is low, even small changes in shutter speed or angle can make the difference between a flat photo and one that feels like a postcard.
You’ll also get guidance on camera basics that are easy to forget when you’re sleepy:
- How to use light (not just what to point at)
- Framing (what to include, what to cut out)
- Shutter speed (how motion in water and splashes will change)
- Focal points (what the viewer should land on first)
If you’re a beginner, this is exactly the right order: learn the terms, then see them in action right away. If you’re more advanced, you’ll still benefit from being shown where the strongest angles are rather than wasting time experimenting.
Quick breakfast, then more east-side locations
After sunrise, you stop for a quick breakfast. Food and drinks aren’t included, but the timing is smart. It gives you a chance to reset after the early start, and it keeps you going rather than letting the tour drift into a long mid-morning pause.
Then the tour continues with 5-6 different locations around the east side of Oahu. This is where you get variety: not just one dawn setup, but multiple chances to shoot different textures and lighting styles. More stops also means the guide can help you practice the same core photo skills in different conditions, great for retention.
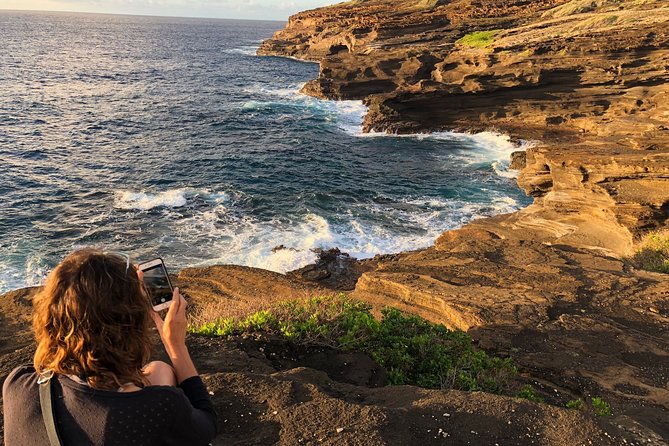
The framing and angles practice that makes your photos look intentional
Between stops, you’re not just taking photos. You’re learning how to see composition. That’s why the tour calls out items like framing and focal points: it trains you to build an image rather than collect a memory.
A useful mindset: think of each location as a new question. Where is the sun in relation to your subject? What’s the strongest background layer? Where should your viewer’s eye go? The best coaching on tours like this helps you answer those questions without turning it into homework.
Tripod inclusion: why that’s more than a convenience
Tripods are included, which is a big deal for a sunrise tour. Low light and fast-changing scenes often push cameras toward slower shutter speeds and smaller apertures. A tripod helps you control steadiness so you can use your settings instead of fighting blur.
Also, having tripods provided lowers the barrier for beginners. You’re not stuck renting or hunting for a stable setup on the day. And if you do have a tripod, you can still follow the guidance and practice proper placement.
Practical note: bring comfortable shoes. You’ll be walking with your gear in the morning light and likely shifting positions to catch the best angles.
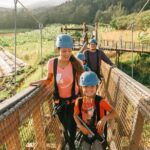
Small-group attention: the difference between seeing and learning
This tour keeps the group small. The data you get includes a cap of up to 7 per booking, with the activity listed as max 8 travelers. Either way, it’s not a giant bus crowd where the guide talks at you and you never get correction.
That’s why the best moments in the reviews focus on personalized help. People mention being taught based on their skill level and getting patient guidance through each stop. In practical terms, it means you can ask questions, get feedback while you’re still at the location, and adjust your next shot rather than hoping it works out later.
The risk is that if someone isn’t set up correctly (gear readiness, camera familiarity), time can get uneven. One critical comment notes that the guide spent more time with two participants on a photo shoot, leaving less time for others. So if you want lots of one-on-one help, come prepared and communicate your needs early.
What to bring (and what to plan for)
You’ll be required to bring your own camera. Tripods are provided, but the camera is your responsibility. If you rely on something basic that doesn’t let you control settings at all, you may miss the core of the workshop.
Bring:
- Comfortable, closed-toed walking shoes
- A hat and sunscreen
- Clothes appropriate for changing sunrise wind and humidity
- Your camera (and any straps/batteries you need)
What to expect:
- Food isn’t included, even though there’s a quick breakfast stop
- You’ll be operating in all-weather conditions, so dress for damp and breezy weather
Weather, timing, and why the tour still runs
This experience operates in all weather conditions, but it also requires good weather. The usual logic here is: if the tour can’t run safely or the sunrise visibility is compromised, you’re offered a different date or a full refund.
Timing is fixed by sunrise. That means you’re trading a normal morning sleep-in for a real chance at light that you can’t fake later in the day. If you’re willing to plan around it, you’ll get more than just a view, you’ll learn to work with the light you came for.
Who this tour is best for
This tour fits best if you:
- Want real photography coaching for the camera you already own
- Like structured stops rather than wandering
- Enjoy early mornings when the whole point is the light
- Are traveling with varied skill levels and still want help that adapts
It can also be a great family-friendly option in the practical sense that most travelers can participate and the group stays small. But if you’re mostly after scenic sunrise sightseeing with minimal instruction, you might feel the pace is too workshop-like.
Should you book Oahu Sunrise Photo Tour from Waikiki?
I’d book it if you want your Hawaii photos to improve fast. The combination of Waikiki pickup, tripod support, and a guide teaching core camera concepts at multiple stops is the kind of value that shows up in your results, not just your memory.
I’d skip or rethink it if:
- You’re not bringing a camera you can use confidently
- You hate early mornings and won’t do the sunrise part
- You want a relaxed, mostly free-form tour with lots of time off-camera
If you’re on the fence, here’s a simple test: if you’ll still be excited to learn framing, shutter speed, focal points, and light when you’re standing on a windswept beach at dawn, you’re exactly the right kind of traveler for this.
FAQ
How long is the Oahu Sunrise Photo Tour?
The tour runs for about 5 hours.
Do I get pickup from Waikiki?
Yes. Round-trip hotel pickup and drop-off from Waikiki are included.
Is the tour limited to small groups?
Yes. A maximum of 7 people per booking is listed, and the activity shows a maximum of 8 travelers.
Are tripods included?
Yes. You get use of tripods as part of the tour.
Do I need to bring a camera?
Yes. Participants are required to bring their own cameras.
Is food included?
No. Food and drinks are not included, though there is a quick breakfast stop after sunrise.
What time does the tour start?
It departs about an hour before the sun comes up, which makes it an early start.
Does the tour run in bad weather?
It operates in all weather conditions. If it’s canceled due to poor weather, you’ll be offered a different date or a full refund.
What’s the cancellation policy?
You can cancel for a full refund up to 24 hours before the experience’s start time. If you cancel less than 24 hours before, you won’t get a refund.